Now that you’re all set up in WordPress, looking beautiful, and have a couple helpful plugins installed, it’s finally time to start posting! I’m going to share two helpful tips that would have saved me HOURS of work. Ugh. It’s been a process. Here we go.
First, use keyword planner for ideas on blog post titles and URLs.
My brilliant, skillful, and incredibly handsome husband is a digital marketing/SEO expert (don’t worry… I’ve bribed him into helping you too). He taught me how to effectively use keyword planner as a beginner blogger. This tool will help you know how many people are interested in a topic and also start helping them find your blog. What good is having a beautiful blog with awesome content if no one can find you, right?!?!
‘Sign in to AdWords‘ with your gmail address and password.
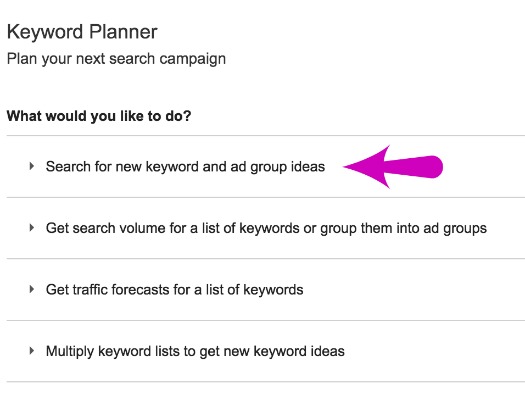
Click on ‘search for new keyword and ad group ideas’.
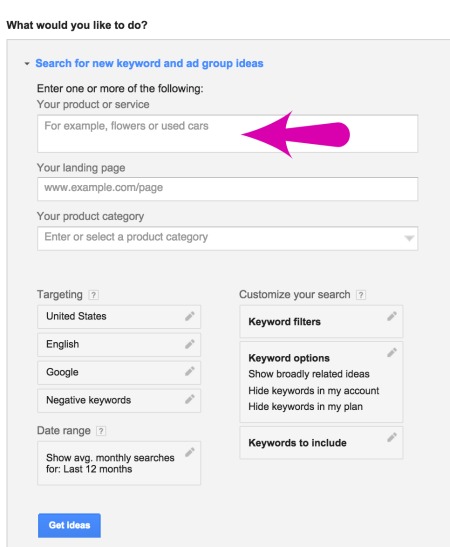
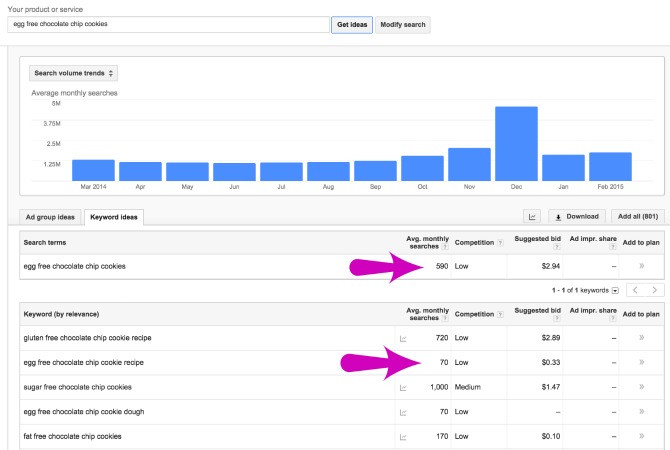
In the top section, input your idea for your blog post. I’ll share the example of how I came up with the URL for my crazily addicting sugar-free, egg-free, and gluten-free Chocolate Chip Peanut Butter Cookies. I input ‘egg free chocolate chip cookies’ to see how many people are even looking for such cookies. Once you input your idea, click ‘get ideas’.
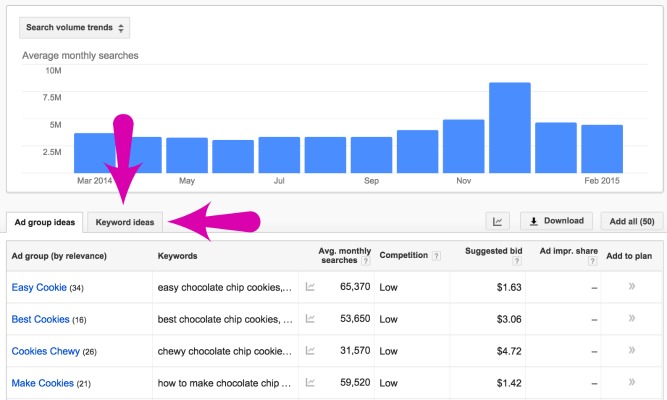
Then click on ‘keyword ideas’.
There are 590 average monthly searches for ‘egg free chocolate chip cookies’. Nice! I’m on the right track.
As you can see, there are higher numbers (more popular search terms) and lower numbers (less popular searched terms). There are benefits for choosing both popular and less popular keywords. My husband is fabulous at explaining all this SEO mumbo-jumbo in terms that even I can understand. He’ll hit more on strategy and how to choose the right keyword in his easy SEO guide for bloggers. For now and to keep it simple, choose a term in the range of 50 to 1000 avg. monthly searches.
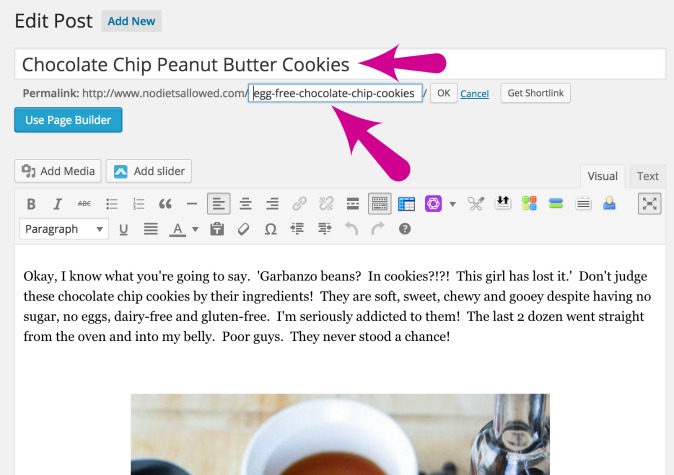
I chose ‘egg free chocolate chip cookies’. Input your chosen keyword as your blog title. A permalink will automatically generate below. You can keep your keyword as your blog post title or erase it and title your post with a different keyword or something more creative. Egg Free Chocolate Chip Cookies is pretty boring so I switched the title to Chocolate Chip Peanut Butter Cookies.
Second, use keyword planner to name your images and resize them!
Do you know what origin_4034622231.jpg is an image of? Neither does Google! BUT, I bet you and Google have a much better idea on an image titled ‘gluten free sugar free chocolate chip cookie recipe‘. Since you have keyword planner up, use it to help you name your images too!
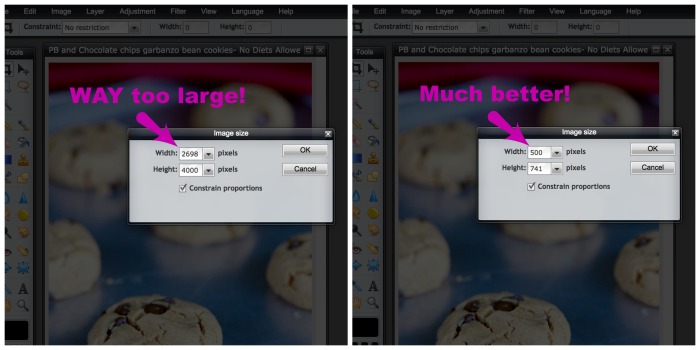
Also, I was clueless that you needed to resize your images or it will slow. your. site. down. This is where I spent HOURS of wasted time since I had to go back and resize dozens of images. Don’t make the same mistake.
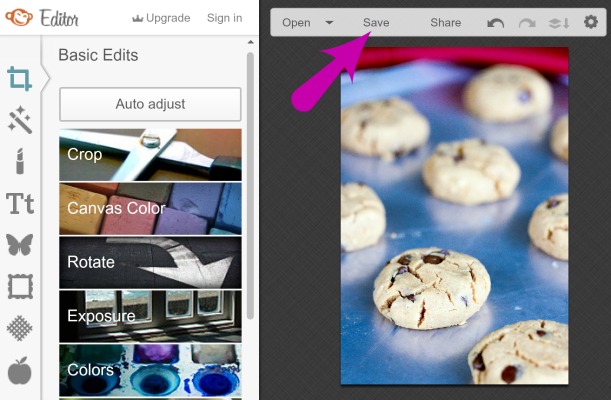
So… name every image and resize that baby. Your image should be no larger than 600 pixels in width and 800 pixels in height. There are a few free photo editing websites that make this pretty simple such as PicMonkey and Pixlr. Since I’m going to address photography and editing in another post, I’ll show you quickly how to name and resize your images starting with PicMonkey.
Click on ‘save’ once you’re done editing.
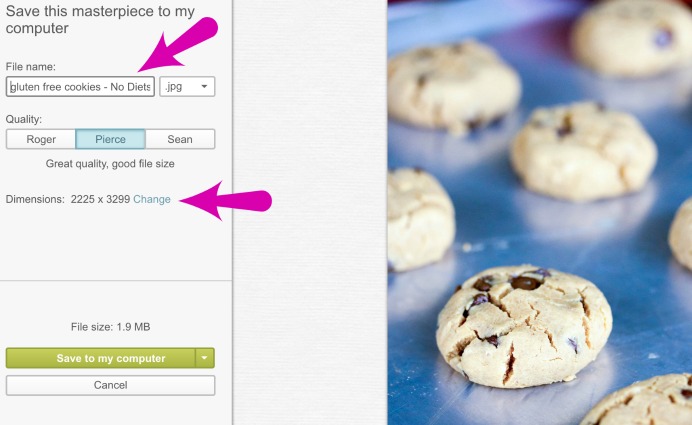
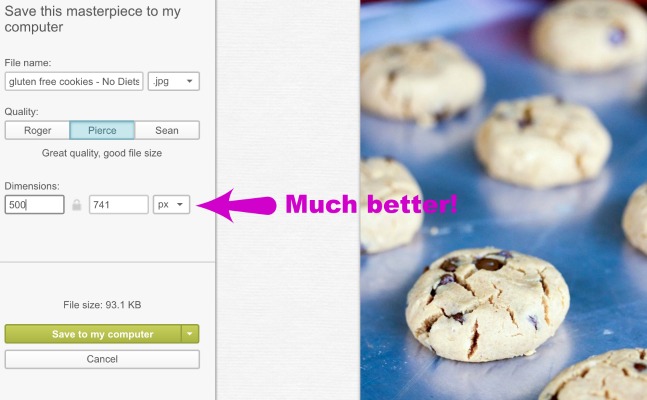
Give your image a name and click on ‘change’ to resize image.
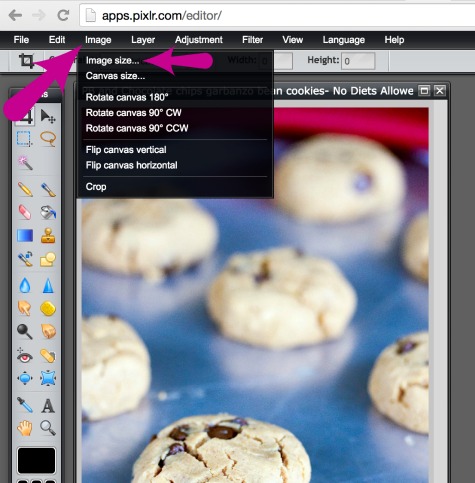
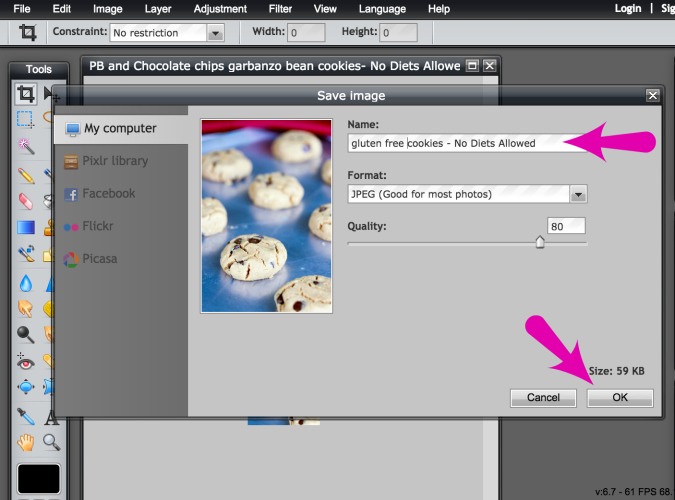
Now here’s resizing in Pixlr. Click on ‘image’ from the menu and then ‘image size’.
Change the size and hit ‘okay’.
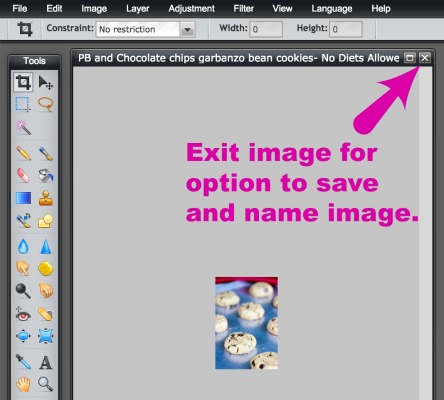
Name your image and save your masterpiece.
Okay, now start posting in peace knowing you’ve establish a great foundation from these first four steps. The world is dying to read what your dazzling mind has to share.
There is SO much more coming on how to start a blog. Step 5 is on analyzing and evaluating your site which will help you increase readership and give your audience more of what they want!
