When I first started my blog in 2013, I was an amateur blogger and photographer… actually, is there a step below amateur? Seriously, I had zero, zilch, nada experience with either.
I had just bought a DSLR camera and had no idea how to use it. I would point and shoot without understanding any basics on photography. I quickly learned I was scaring not attracting visitors with my horrible photos. As I started to learn and practice (lots and lots of practice), I was improving BUT still not getting those gorgeous I-need-to-eat-this-now food photos.
That’s when I stumbled upon Pinch of Yum’s Tasty Food Photography eBook. This detailed, easy to understand eBook taught me (amateur of all amateurs) how to improve. I immediately started to see an increase of visitors once my photography improved and it’s solely because of this eBook! I now understand aperture, shutter speed, staging, editing, and so so so much more! It’s such an amazing deal for the quality content provided.
The best part? You have 30 days to try it. If you don’t love it, money back!
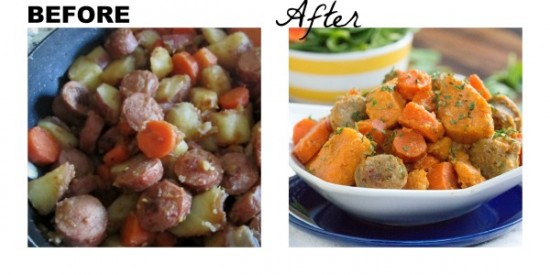
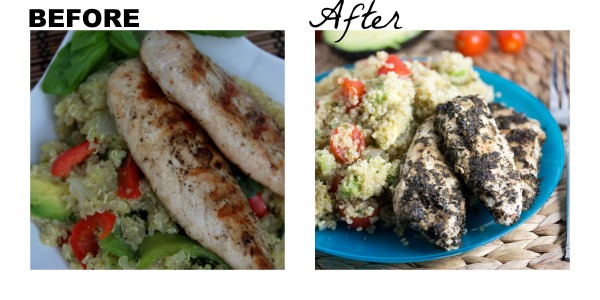
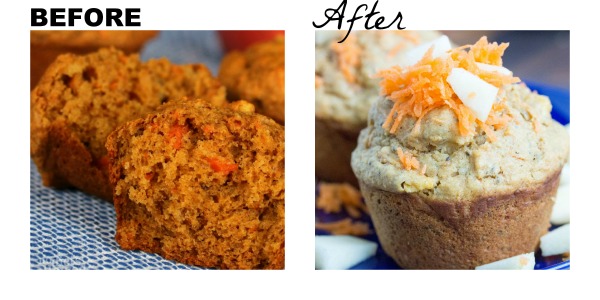
Here are some of my ‘before’ and ‘afters’ once I started implementing what I learned from Pinch of Yum’s Tasty Food Photography eBook.
 Here’s a couple food photography tips that have made ALL the difference for me.
Use natural light. When using natural light, find a shaded area or use a sheer white sheet to soften the direct sunlight. Use a reflector to decrease the amount of shadows on the opposite side of your light source. Photograph your food in the morning or evening. The light will hit your object from the side creating beautiful contrast.
It’s all about white balance. Lindsay in her Food Photography eBook gives very simple, easy to follow instructions on editing your photos. If the ONLY thing you edit on your photo is white balance, take time to do it. It removes the unwanted warmth and coolness from your photo and restores your food photo to its true color.
Take time to stage your food. And when I say time, I mean 2 to 5 minutes. With two little ones, I don’t get more time than that. I ask myself these questions as I’m preparing to stage.
- What can I add to give a pop of color? An ingredient? A colorful plate or bowl?
- What can I do to add texture or contrast? Take a bite out of a muffin? Sprinkle dried parsley on top of my soup? Add a patterned or bright dish towel?
- How can I make my reader’s mouth start watering just by looking at the picture?
Practice, practice, and practice. I have improved drastically in two years (see my above ‘before’ and ‘afters’, but I’m definitely not done practicing. Whenever I can’t figure out how to make something look good, I refer back to my Food Photography Bible…. Pinch of Yum’s Tasty Food Photography eBook. Check out this quick video and see why I can live without this eBook. You’ll love it! Remember… you have a 30 day money back guarantee.