It’s been two years since I created this gem I affectionally call No Diets Allowed. Oh, how I wish I had a time machine to go back and teach my naive little self on all the basics of blogging. When I started my blog, I knew nothing, zilch, diddly squat on blogging and how to make a successful blog. All I knew was I loved food, cooking, and sneaking health into life and thought starting a blog would be simple and painless. Oh young blogger, Kami. There’s so much I need to tell you yet I cannot.
Well, there’s no need for you to shed unnecessary blood, sweat, and tears (I shed enough for both of us). I’m going to provide you a step-by-step on how to start a successful blog and save you hours (in my case, a year) of wasted time. I can’t talk-the-talk or walk-the-walk of a techie, so I promise to speak non-nerd through each step.
Also, I’m an affiliate with the companies in my how to start a blog series. I’ll earn a small commission when you purchase through one of the links shared. However, I personally use all recommended products and services and will not recommend anything I do not use.
CHOOSING AND PURCHASING A DOMAIN
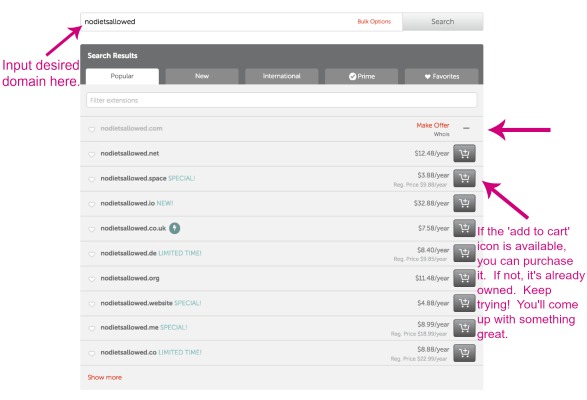
It’s time to name your baby. When choosing a domain, pick a domain that’s simple, easy to spell, easy to remember, and generally gives people an idea on what you’re all about. My husband and I played around for a couple of hours on NameCheap before deciding on www.nodietsallowed.com. I recommend purchasing either a ‘.com’ or ‘.net’ since that’s most popular and easiest for others to remember.
If you already have hosting (I’m going to get to that next), you can purchase your domain through NameCheap. If you need to purchase a domain and hosting, hang on. You can get a free domain when signing up with BlueHost or HostMonster.
QUICK TIP: Now that you’ve decided on a domain, go grab those names on all the major social media sites (Facebook, Pinterest, Twitter, Instagram, YouTube, Google+, etc.).
HOSTING
Now that you have a domain, you will need hosting. Hosting basically allows your blog to be found on the internet (remember my promise of no techie-talk). I currently host through HostMonster which have the same owners as BlueHost…. meaning they’re the exact same company. Their checkout processes are identical, however sometimes one has slightly lower prices than the other. Just quickly check which is cheapest and go with that one. Either way you choose, you’ll be happy with the service.
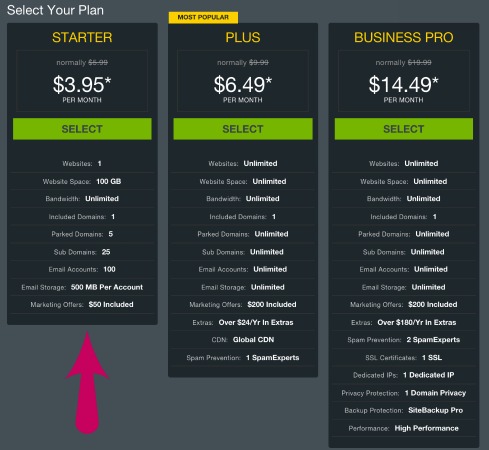
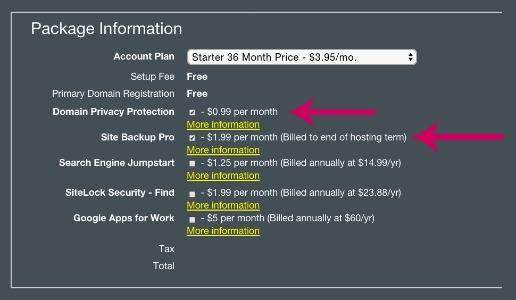
After clicking the ‘sign up now’ button, you’ll be asked to select a plan. I recommend beginning with the ‘starter’ option. It will save you some money at the beginning. If you end up buying another domain or hosting another website, you can easily and seamlessly upgrade to the ‘plus’ or ‘business pro’.
Here’s where you get your FREE domain! You can check for your domain availability here just like you can at NameCheap.
I HIGHLY recommend purchasing Domain Privacy Protection. The ‘whois’ information (the owner of the domain, address, email, and phone number) is available to anyone on the internet. Your whois information can be harvested by marketing companies, which will give you unwanted solicitations.
I also chose to purchase Site Backup Pro. It backs up your blog and can automatically restore if, heaven forbid, any files are lost.
Then finish checking out! Easy Peasy.
INSTALLING WORDPRESS
On the main page of the hosting company you decided to go with (BlueHost or HostMonster), login to your account.
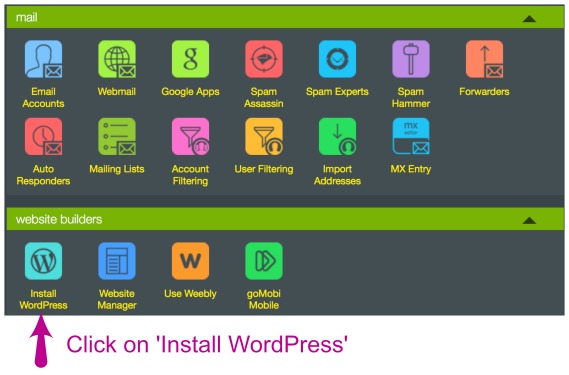
Under website builders, click on ‘Install WordPress’.
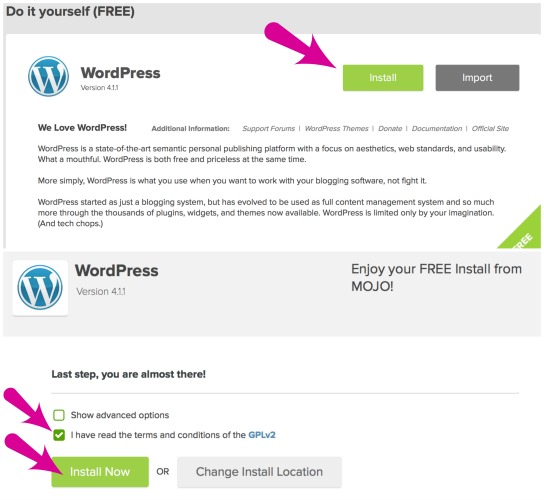
Three more clicks and you have successful installed WordPress!
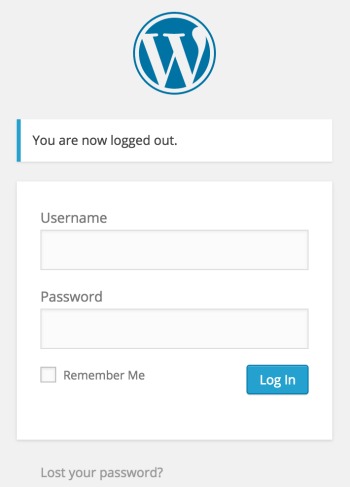
Once you’ve installed WordPress, you will be able to view your credentials with your Admin URL, username, and password. Make sure to keep the info somewhere safe and secure. To login, go to your Admin URL. It will bring you to a screen like this where you can login with your username and password.
Congrats! You’ve officially started your blog. Now… on to the fun part! Step 2 is all about themes and design.
